How to configure SSL link for MAWi Server
How to configure SSL link for MAWi Server
(v2 - Updated 29.12.2020)
This guide will give step-by-step instructions on how to configure an SSL link to the MAWi server platform.
Here we will show how to use the free service sslforfree.com for creating the SSL certificate.
In the same way, you can use any valid SSL service available in the market.
In case you already have a certificate installed in your IIS server, you can skip this part.
1. How to acquire SSL certificate from ‘SSL For Free’
Example Server details:
External IP address or Domain name: 34.87.137.249
Create a certificate for your domain > You will require to register and then it will open the following dashboard:
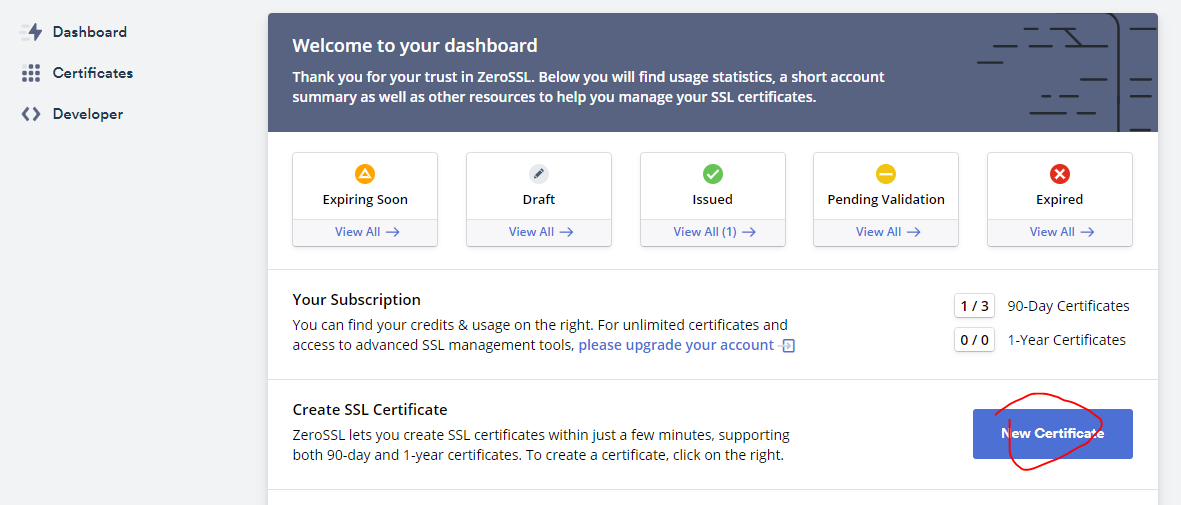
Click on New Certificate > enter your IP or Domain name again:
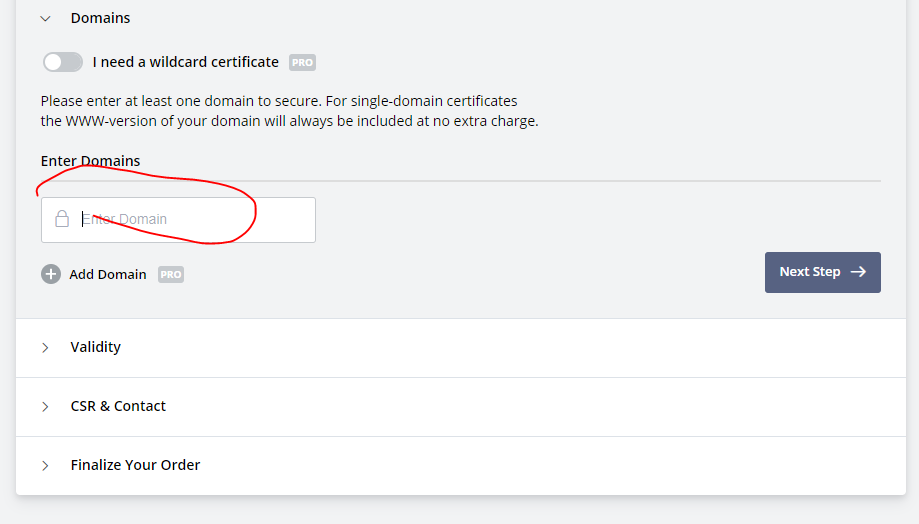
Click on the Next Step and Finalize your Free order > Now you will need to validate your IP or Domain name:
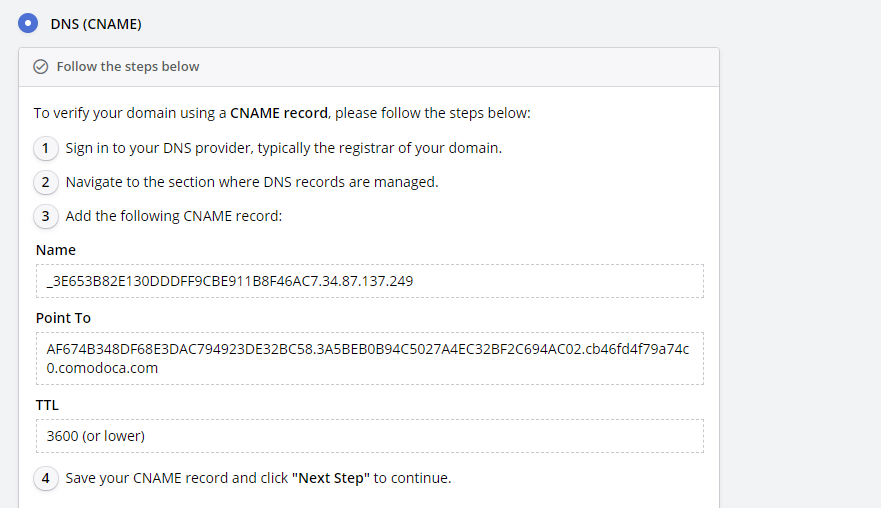
In case you are using a Domain name, simply add a CNAME record in your DNS admin panel. In case you are using an IP address, please follow the steps shown below:
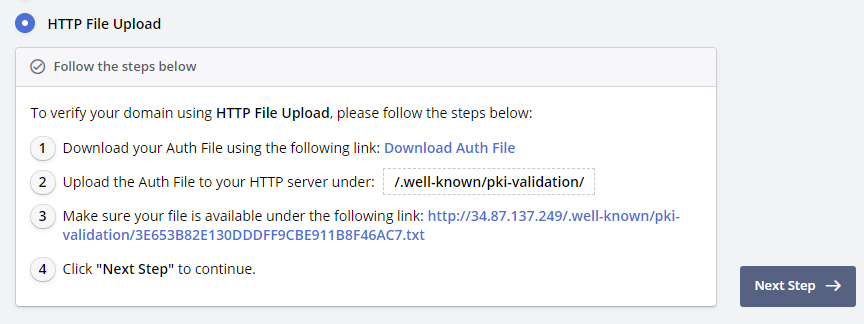
Here you are instructed to download a txt file and place it in the following directory:
.well-known\pki-validation
In order to create such folder you will have to create a Virtual Folder:
Create a folder on the C-drive, name it “well-known”. Create another folder named pki-validation. Example: C:\well-known\pki-validation
Place the text file in the “pki-validation” folder.
Open the IIS Manager on the server, right-click on your site and select Add Virtual Directory....
In the Alias entry fill in “.well-known” and in the Psychical Path entry fill in the path to the Well Known folder. Example: C:\well-known
End with OK, the folder and files within should work properly now and are reachable over the Internet.
You are now ready to verify the IP or Domain name:

Go to Certificates and select to Download the certificate of your IP or Domain:

After downloading the ZIP file, extract it on your local machine and now we need to convert it into PFX file. Go to the following website:
https://www.sslshopper.com/ssl-converter.html
On the Type to convert, change to PFX/PKC5#12:
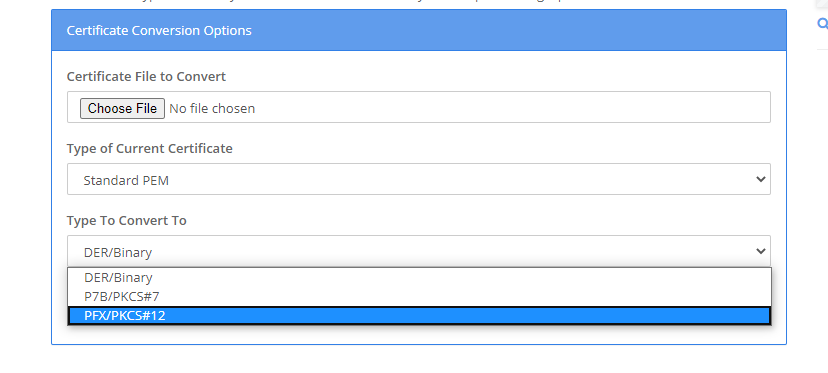
Then this page will load:

Choose the 3 files as shown above and click on the “Convert Certificate” button.
Three files will be generated (PFX, CRT, KEY) - copy them to the PC that runs the IIS Server.
2. How to apply your SSL certificate in your IIS Server
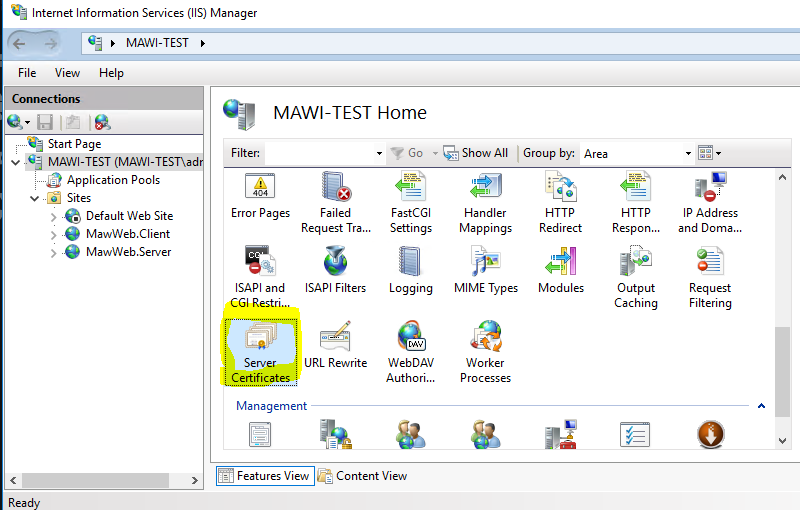
To apply the SSL Certificate in IIS Server, open the IIS Server Console:

Select “Server Certificates” :
Click on Import... :
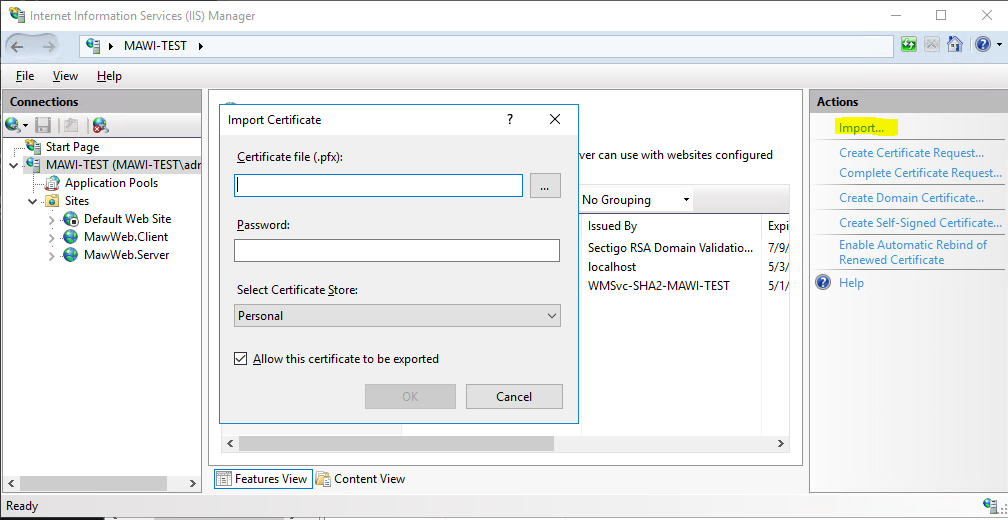
Select the PFX file that was generated in the previous section or your own certificate and click OK.
Once done, your certificate is ready to be assigned to your site.
3. How to assign a certificate to your MAWi site
In the IIS Server, open the Sites section and select the MAWWeb.Client site:
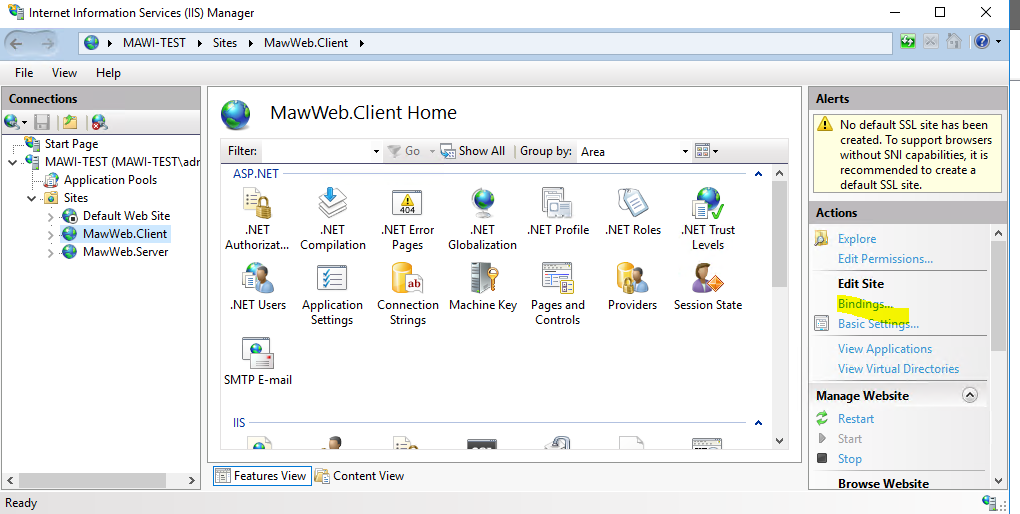
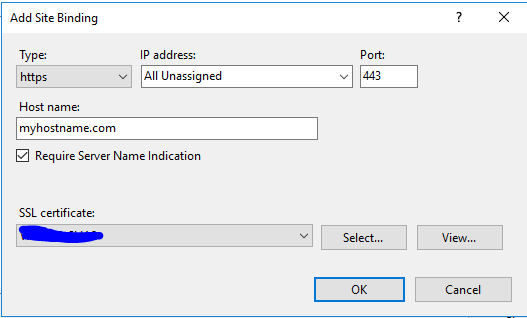
Click on Bindings > Add...

Change the Type to HTTPS >
Port can be 443 or any other port you select >
Hostname should be set with your DNS assigned hostname >
Tick the ‘Require Server Name Indication>
SSL Certificate - Select your certificate > OK
Restart your Site:

Perform the same for the MAWWeb.Server site.
4. The last step is to change the config file for the gateway:
Go to:
C:\Program Files (x86)\Monitors AnyWhere\Web.Client\assets\config
Edit the file: development.json
Change to the following:
{
"host":"https://myhostname.com",
"api":"https://myhostname.com/api/",
"Debugging":true
}
Replace “myhostname.com” with your own hostname or IP address.
Once done, you can try logging in to MAWi dashboard over SSL:

5. Connect MAWi Client over SSL
After following the above steps, you can now connect the MAWi Client over SSL:
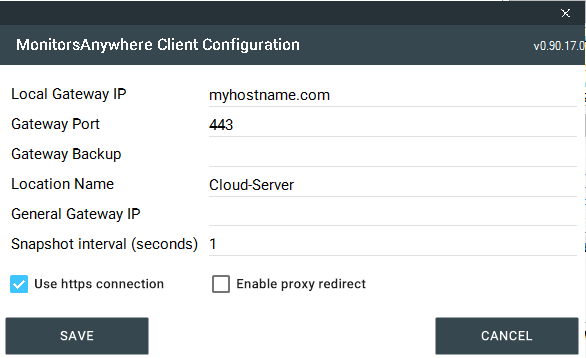
Local Gateway IP: set with your own hostname or IP
Gateway Port: 443 or any other port assigned for the SSL connection
Tick the option “Use HTTPS connection”
Related Articles
MAWi Spacewall - Quick Installation Guide - Utilizing Android-based MAWi Players
MAWi Spacewall - Quick Installation Guide Introduction MAWi Spacewall is a tool for managing screen displays. Here's a simple breakdown: 1. Display unique content on individual screens. 2. Link several screens to show identical content. 3. Design ...Quick Installation Guide – MAWi USB - Utilizing USB to HDMI converters for affordable Video Walls
Quick Installation Guide MAWi USB Introduction MAWi USB combines an easy-to-use application with commercial-grade USB to HDMI adaptors. MAWi USB is a tool for managing screen displays. Here's a simple breakdown: 1. Display unique content on ...MAWi Zero - Quick Installation Guide - utilizing HDMI over LAN/Ethernet zero clients
MAWi Zero - Quick Installation Guide Introduction MAWi Zero is a tool for managing screen displays. Here's a simple breakdown: 1. Display unique content on individual screens. 2. Link several screens to show identical content. 3. Design large video ...Enable SSL connection for MAWi Server and Agent
Introduction In MAWi v2 we've added a new option to set the connection with the server and agent over a secured SSL link. This option is available only if your server is connected to the Internet. This connection is required to acquire the SSL ...MAWi Link - Quick Installation Guide - Using Android-based devices for a Standalone Configuration
MAWi Link - Quick Installation Guide Introduction MAWi Link is a tool designed for managing screen displays. Here's a simple breakdown of its features: 1. Display unique content on individual screens. 2. Schedule content playback across screens ...